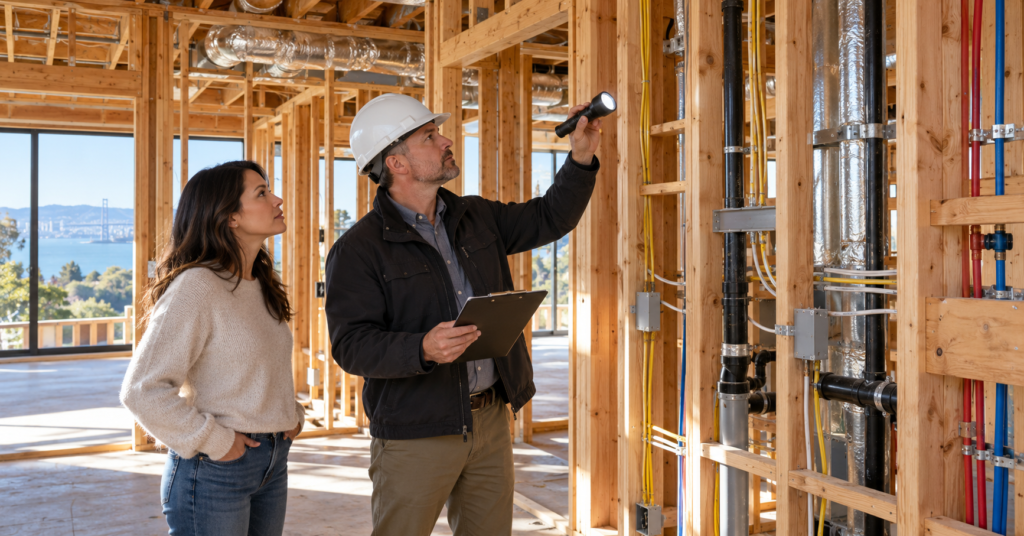
Building a Bay Area home involves more than choosing finishes and watching rooms take shape. Before drywall covers the framing, there is an opportunity to examine accessible work that will soon become difficult to see.
A Bay Area pre-drywall inspection can help homeowners identify concerns and discuss them with the builder while construction is still underway. Getting useful results depends on scheduling the visit correctly, understanding its scope, and allowing time to address findings.
Choose the Right Construction Stage
Discuss the inspection with your builder early. Waiting until the drywall crew is scheduled can leave little time for the inspection report, contractor responses, or follow-up work.
The usual inspection window comes after framing and the rough installation of electrical, plumbing, and heating and cooling components. Confirm the inspector’s readiness requirements, including the condition of roofing, windows, and exterior coverings.
Ask specifically about insulation. It can conceal framing details and service routes before drywall is installed. Depending on the scope, an inspection before insulation and a separate review afterward may be appropriate.
Have the site supervisor provide advance notice as the project approaches this stage. Reconfirm readiness before the appointment and agree on how schedule changes will be communicated.
Coordinate With Required Permit Inspections
A private inspection should work alongside the inspections required by your local building department.
For example, San José’s rough frame inspection checklist places that inspection before insulation and explains the related electrical, plumbing, and mechanical approvals.
The sequence for your project depends on its jurisdiction and permit requirements. Ask the contractor to confirm which inspections have been completed and whether any correction notices remain open.
A private inspector’s report does not replace municipal approval, engineering observations, or required special inspections. Keep the permit inspection record available so the homeowner, builder, and inspector understand the project’s status.
Define the Scope and Share Project Details
Request a written scope for the specific construction stage. According to InterNACHI’s pre-drywall guidance, potential inspection areas include framing, electrical wiring, plumbing placement, HVAC ducts, firestopping, and accessible waterproofing details.
Explain any changes made during construction, such as a relocated bathroom or revised kitchen layout. Provide current drawings and relevant revisions if the inspector requests them. Confirm separately whether comparisons against plans or specifications are included.
Ask the report to distinguish observed defects from incomplete work that needs a later review. Equipment that is disconnected, unfinished, or unsafe to operate cannot receive the same functional evaluation as a completed system.
A visual inspection also has limits. It cannot reveal every concealed condition or substitute for an engineer’s assessment of structural design.
How Red Shield Inspections Can Help
Red Shield Inspections serves Northern California and the Greater San Francisco Bay Area. Its new construction services include phased inspections at foundation, pre-drywall, and completion stages for custom builds.
For homeowners approaching drywall installation, the company offers an opportunity to have accessible framing and rough installations reviewed and documented before walls close. Its new construction service addresses structural components and electrical, plumbing, and HVAC systems within the agreed inspection scope.
Red Shield describes its reports as clear explanations supported by photographs, video, and recommendations. Its website also identifies mobile-friendly, PDF-compatible reporting, making findings easier to review and share with the builder.
The company separately offers construction project repair verification. Where corrections are needed, ask whether that service would be suitable for checking the completed work while it remains accessible.
When contacting Red Shield, provide the project address, construction stage, and site supervisor’s details. Confirm availability, report turnaround, fees, and follow-up arrangements. Reviewing a sample report can also help you understand how observations and recommended actions will be presented.
Address Moisture Before Enclosing Materials
If construction materials have experienced rain exposure or a plumbing leak, ask how the affected areas were dried and checked.
The EPA’s moisture-control guidance explains the importance of managing moisture during construction. Its published Indoor airPLUS specifications advise against enclosing framing and insulation with high moisture content.
Give the inspector available photographs and a short account of any water exposure. Ask the builder who will confirm that affected materials are ready for enclosure and what project requirements apply.
Moisture measurements and mold assessments are not automatically included in a visual inspection. Confirm whether additional evaluation is appropriate and who will perform it.
Create a Clear Process for Corrections
Send the report to the site supervisor and request a response to each relevant finding. Use the report’s location descriptions and photographs to identify the work being discussed.
Record who will handle each item, what action is proposed, and when it will be completed. Ask which concerns need resolution before enclosure and which can be checked later.
If a finding involves a potentially problematic alteration to framing, ask whether the project engineer needs to review the proposed correction. When opinions differ, request supporting drawings, installation instructions, or professional clarification.
Agree with the inspector on whether photographs are sufficient to document a correction or whether another site visit is needed.
Confirm Access and the Full Inspection Cost
Establish who will authorize entry, meet the inspector, and arrange safe access around active construction. Check whether the builder requires advance notice for outside inspectors.
Request a written quote explaining the inspection scope, reporting, and any discussion of findings. Clarify charges for return visits, additional testing, or rescheduling when the site is not ready.
When comparing quotes, give each inspector the same project description, including its size, construction stage, and additional structures. This makes it easier to understand what each fee covers.
Preserve Records for the Finished Home
With permission, retain photographs showing room locations and visible service routes. Organize them with inspection reports, builder responses, approved revisions, and repair documentation.
Label images by floor and room, and keep updated photographs if later work changes an area. These records may help with future maintenance, but they do not establish that drilling or cutting into a finished wall is safe.
Keep the completion inspection as a separate milestone. Finished equipment and operating systems allow checks that could not be completed during the rough stage. Share unresolved earlier findings when arranging that visit.
Note: This article provides general construction-planning information. Inspection scope, required approvals, and sequencing depend on the project and jurisdiction. Confirm arrangements with your inspector, builder, and building department before work is covered.